Negative Grid Lines and Shorthand Syntax
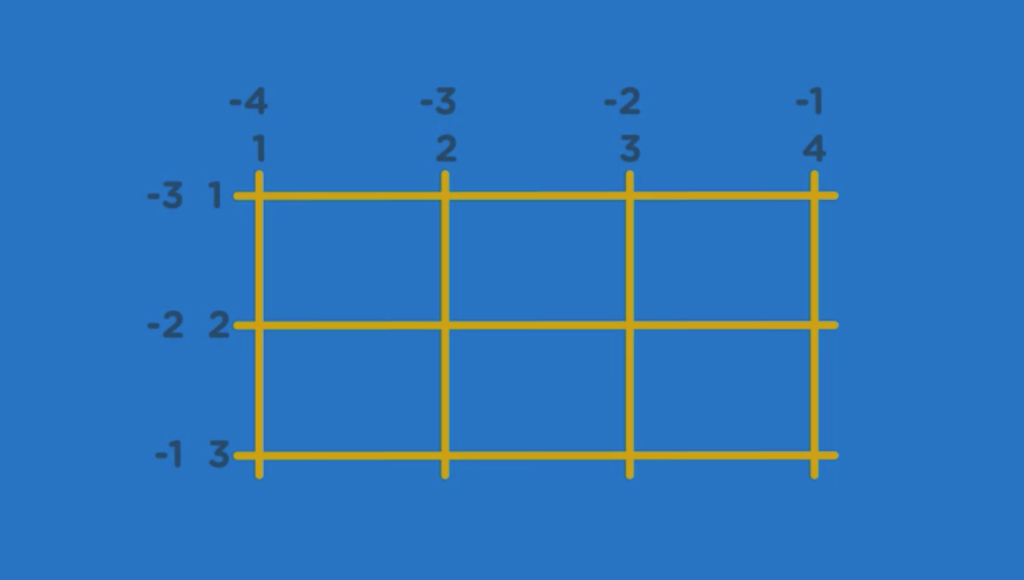
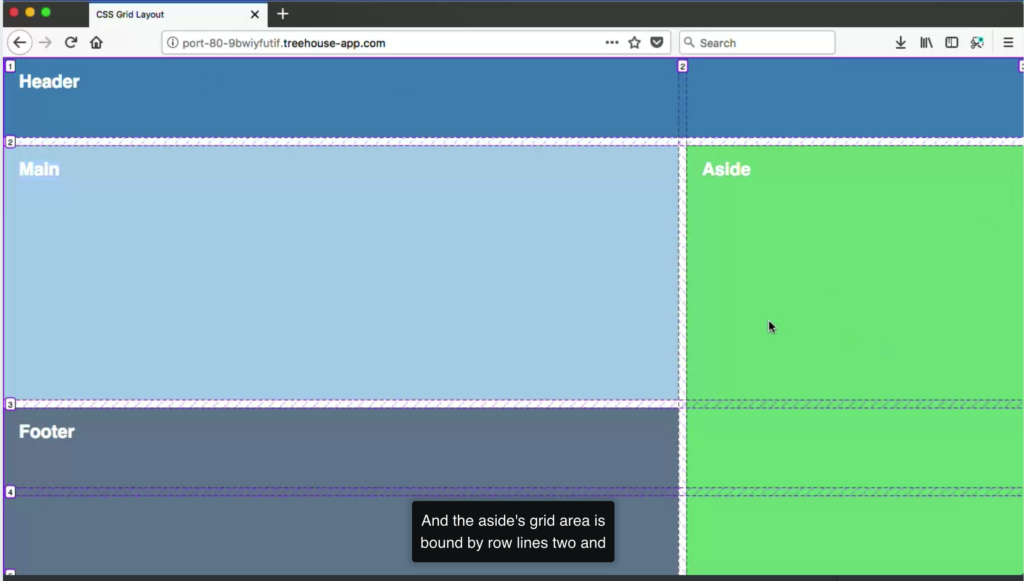
Grid lines also have negative indexes. You can reference grid lines starting from the far right or bottom edges of the grid, using negative line numbers. In this video, you’ll more line placement tips and a shorthand syntax for positioning items by line number.

By setting the end value to -1, even if you add more row tracks to the container, the contents with -1 will always stretch to the end. – will let you count the line tracks backwards.
Shorthand Syntax
header {
  grid-column-start: 1;
  grid-column-end: -1;
}

/*shorthand syntax of the above */
header {
  grid-column: 1 / -1;
}

/* */
aside {
  grid-row-start: 2;
  grid-row-end: -1;
}

/*shorthand syntax of the above */
aside {
  grid-row: 2 / -1;
}
Placing Elements Using Grid Template Areas
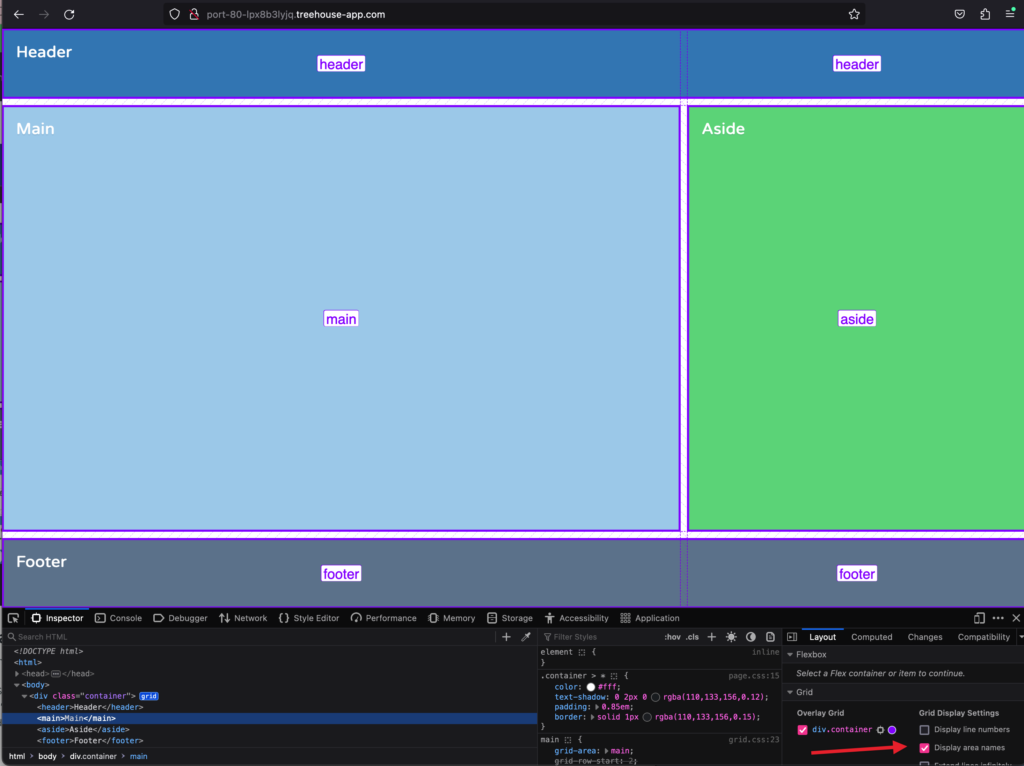
CSS Grid provides a feature that lets you create named grid areas, then you use those names to position items on the grid. First, you’ll use the grid-area property to assign a custom name to each grid area. Then you’ll use the grid-template-areas property to define how the layout looks, by referencing those custom-named areas.
Grid areas – are the slots on the grid where grid items are placed. A grid area is always enclosed by four grid lines, one on each side.

CSS Grid provides features that lets you create named grid areas.
Grid Template Areas
- use
grid-areato assign a custom name to a grid area - use
grid-template-areasto define how the layout looks
By assigning a name to each grid item, we’ve defined a set of individual and reusable grid-template-areas we can place on the grid via the grid-template-areas property.
/* =====================================
   Grid Layout
======================================== */

.container {
  height: 100vh; /*vh means "view-port height */
  display: grid;
  grid-template-columns: 2fr 1fr; /* two columns for the main content and sidebar */
  grid-template-rows: 100px minmax(200px, 1fr) 100px; /* three rows for header, main and aside, and footer */
  grid-gap: 10px;
  grid-template-areas:
    "header header"/*because there are two column tracks*/
    "main aside"
    "footer footer"; /*because we set 3 rows on grid-template-rows*/
}

header {
  grid-area: header; /*this can be any name*/
  /*grid-column-start: 1; /* a number that indicates the start line in a row*/
  /*grid-column-end: 3; /* a number that indicates the end line in a row*/
}

main {
  grid-area: main; /*this can be any name*/
  /*grid-row-start: 2; /* a number that indicates the start line in a column*/
  /*grid-row-end: 4; /* a number that indicates the end line in a column*/
}

aside {
  grid-area: aside; /*this can be any name*/
  /*grid-row-start: 2; /* a number that indicates the start line in a column*/
  /*grid-row-end: 4; /* a number that indicates the end line in a column*/
}

footer {
  grid-area: footer; /*this can be any name*/
  /*grid-column-start: 2; /* a number that indicates the start line in a row*/
  /*grid-column-end: 3; /* a number that indicates the end line in a row*/
}
. – adding period to the template area will create an empty grid cell. / ASCII method
/* =====================================
   Grid Layout
======================================== */

.container {
  height: 100vh;
  display: grid;
  grid-template-columns: 1fr;
  grid-template-rows: 100px 100px repeat(2, minmax(150px, auto)) 100px;
  /* grid-auto-rows: minmax(150px, auto);/*grid autorows gives control over the size of implicit row tracks */
  grid-gap: 10px;
  grid-template-areas: /* this is the default which works for mobile phones*/
    "header"
    "nav"
    "main"
    "aside"
    "footer";
}

header {
  grid-area: header;
}

nav {
  grid-area: nav;
}

main {
  grid-area: main;
}

aside {
  grid-area: aside;
}

footer {
  grid-area: footer;
}

@media (min-width: 768px) {
  .container {
    grid-template-columns: 1fr 2fr 1fr;
    grid-template-rows: 100px minmax(150px, auto) 100px;
    grid-template-areas:
      "header header header"
      "nav main aside"
      "footer footer footer";
  }
}

@media (min-width: 992px) {
  .container {
    grid-template-areas:
      "header header header"
      "nav main aside"
      "nav footer footer";
  }
}
Using Grid with Flexbox
CSS Grid is not meant to replace Flexbox. Flexbox and Grid are complementary layout tools, and each has their specialties.
Grid are complimentary layout tools, and each have their specialties. The biggest difference between the two is that Flexbox lays out items in a single dimension, in a row, or a column, and Grid lays out items in two dimensions, rows and columns at the same time.
Flexbox does best is align and distribute space within a single access. Grid item can also be a grid container, that’s how grids are nest. But a grid container can also be a flex container, that lays out its children with Flexbox.
Flexbox and CSS Grid are good at different things, and should be used together, and as alternatives to each other. You can use Grid to place your main content inside colums and rows, and use Flexbox to position the smaller details of your design like buttons and navigation menus.
/* =====================================
   Grid & Flexbox Layout
======================================== */

.main-content {
  width: 95%;
  max-width: 1000px;
  display: grid;
  grid-template-columns: repeat(auto-fit, minmax(280px, 1fr)); /*columns to be not narrower than 280px*/
  grid-gap: 20px;
}

.card {
  display: flex;
  flex-direction: column;
}

.btn {
  margin-top: auto; /*the value auto will pins the buttons at the bottom of the cards*/
}
To Remember:
grid-rowandgrid-column– properties that let you use grid line numbers to control how items are placed on the grid.- (.) period – creates empty grid cells inside
grid-template-areasstrings. - Firefox Grid Inspector – a tool that displays a visual representation of your grid to help inspects grid tracks, grid lines, and gutters.
- Grid Area Name – can be any name
- A grid item can also be a flex container that lays out its children with Flexbox.
Resources
- Counting backwards
- grid-row – MDN
- grid-column – MDN
- Line-based placement with CSS Grid – MDN
- CSS Grid Layout: The Span Keyword
- Seven Ways You Can Place Elements Using CSS Grid Layout
- Grid Areas – MDN
- Grid template areas – MDN
- grid-area – MDN
- grid-template-areas – MDN
- Grid Areas – MDN
- Grid template areas – MDN
- grid-area – MDN
- grid-template-areas – MDN
- Grid and flexbox – MDN
- Does CSS Grid Replace Flexbox?
- CSS Grid Layout – MDN
- Two different ways you could write fallbacks for CSS Grid
Leave a Reply