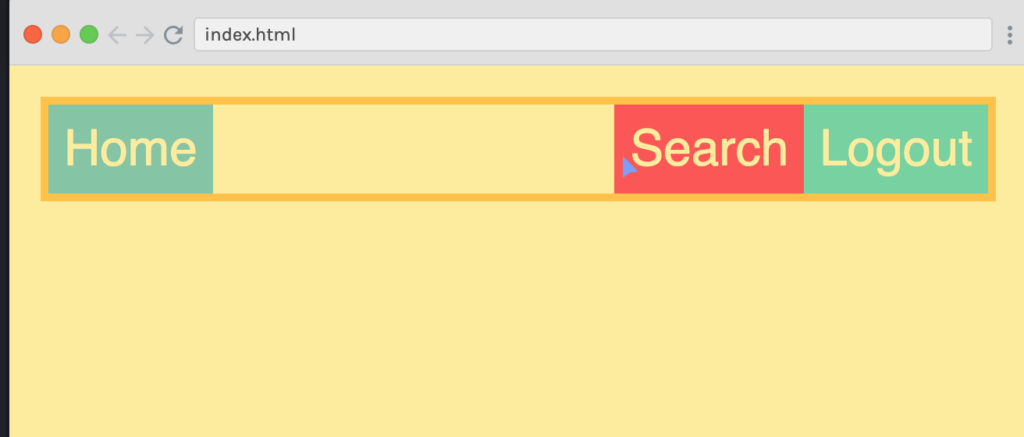
Container and flex items. The flex items and container can be different elements as long as they are direct children of the flex container.
<!DOCTYPE html>
<html>
    <head>
        <link rel="stylesheet" href="basic.css">
        <link rel="stylesheet" href="index.css">
    </head>
    <body>
        <nav class="container">
            <div>Home</div>
            <div>Search</div>
            <div>Logout</div>
        </nav>
    </body>
</html>.container {
border: 5px solid #ffcc5c;
}In order to display the container in flex layout, add the flex display in the CSS.
.container {
  border: 5px solid #ffcc5c;
  display: flex; /* this was added */
}
display: flex; – automatically lines up the elements (flex items) horizontally. In the example above, the flex items are the <div> elements.
Flexbox container always has direction. By default, the direction is horizontal, from left to right in a row.
X and Y Axes
Main X axis goes from left to right. Y axis goes from top to bottom. The default main axis is the X axis, from left to right (row).
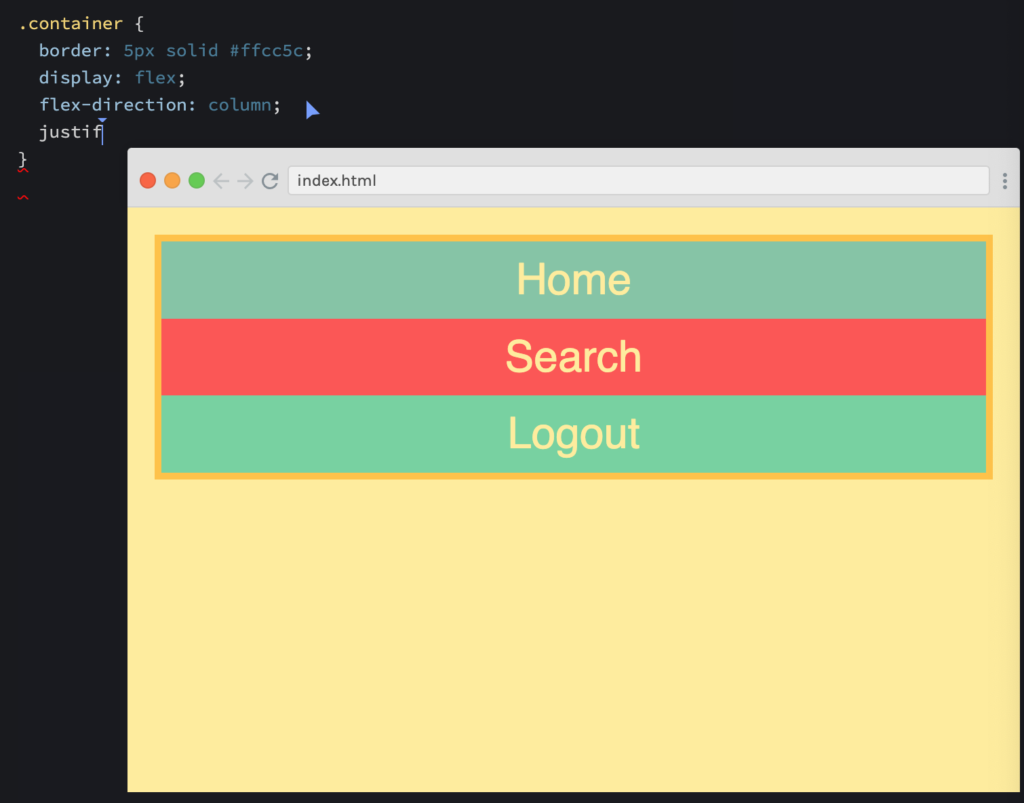
flex-direction changes the main axis to Y-axis, which goes from top to bottom.
flex-direction: column;Justify Content
.container {
  border: 5px solid #ffcc5c;
  display: flex;
  justify-content: ;
}

/* flex-start flex-end center space-around
space-between space-evenly */flex-start– contents are squeezed together at the beginning of the main axis, which is the left hand side.flex-end– contents are squeezed together at the end of the main axis, which is the right hand side.center– center the contentsspace-around– elements are given space in between elements (not including the first and last space, there are spaces still but not the same size of the space in between elements)space-between– gives spaces between elements, but no spaces at all on the first and last space.space-evenly– gives even spaces in between elements + the first and last space.
Positioning Items
In order to target each flex items for positioning, we have to add individual class names for each flex items.
<html>
    <head>
        <link rel="stylesheet" href="basic.css">
        <link rel="stylesheet" href="index.css">
    </head>
    <body>
        <div class="container">
            <div class="home">Home</div>
            <div class="search">Search</div>
            <div class="logout">Logout</div>
        </div>
    </body>
</html>
Now, in order to target “logout” for positioning to the left hand side:
.container {
  border: 5px solid #ffcc5c;
  display: flex;
}

/* This below is added to move "logout" to left hand side */
.logout {
    margin-left: auto;
}
If I target a middle item, all items on the left will get moved, too.
.search {
  margin-left: auto;
}
This above can also be done with:
.container {
  border: 5px solid #ffcc5c;
  display: flex;
  justify-content: flex-end; /* this is added to move all contents to the left */
}

.home {
  margin-right: auto; /* then add this only move the first item to the right */
}
To make the flex items responsive:
.container > div {
    flex: 1;
}
/* This takes all the div items inside the container one whole space in the container. */

/* others to check: flex-grow, flex-shrink, flex-basis */
Align Items
align-items aligns items in the main axis, while justify-content justifies the entire container.
align-self if added to the flex item, with align-items to the container, will align only the targeted flex item in the y-axis.
Flex Direction Column
flex-direction: column; changes the main axis to y-axis, or from top to bottom. The flex items will now be displayed in stacked.

height: 100%; when adding a height to the flex container, this should also be added to the html, body.
.container {
  border: 5px solid #ffcc5c;
  display: flex;
  flex-direction: column;
  justify-content: flex-end;
  height: 100%; /* This is for the container flex */
}

html, body {
  box-sizing: border-box;
  height: 100%; /* This is for the html and body */
  padding: 10px;
  background-color: #ffeead;
}
Wrapping
flex-wrap: nowrap; is the default, which means there will only be 1 row or 1 column. This means that if we set a width to each flex item, it will shrink and not follow the size we set it to as there will only be one row or one column.
flex-wrap: wrap; is added and will wrap the flex items. It means that it displays each flex item to the specific width or height we set it to, and will go to the next line if no enough space. This creates additional column or row.
Flex Properties
flex: 1; this is a shorthand, which is also equivalent to flex: 1 1 0; (similarly handled with if margin: 0; is the same as margin: 0 0 0 0; or 0 margin on all sides.
.home {
   flex: 1 1 0;
 }

 /*is similar with*/

 .home {
  flex-grow: 1; /* decides how much of the extra space will be distributed as the screen gets bigger/wider */
  flex-shrink: 1; /* shrinkes the items as the screen gets smaller */
  flex-basis: 0; /* sets the base width of the element, or the max, depending on the width of the screen */
}
Order Property
.item1 {
    order: 1;
}

.item2 {
    order: 2;
}

.item3 {
    order: 3;
}
Every flex item should have an order value, otherwise they have a default 0 value, which will be in the beginning.
I worked on the image grid with the following, and learnings:
.container {
    display: flex;
    flex-wrap: wrap;
}

.container > div > img {
    width: 100%; /* displays the images in max width */
    height: 100%; /* displays the images in max height  */
    object-fit: cover; /* this fits each container as cover */
}

.container > div {
    flex: 1 1 150px; /* this works with the CSS code above for .container > div > img, means the max size is 150px width, and the 1 1 will make the images displays fitting the entire row */
}

.container > .big {
    flex: 1 1 250px;
}
Leave a Reply