Firefox Grid Inspector Tool
Position Items by Grid Lines
CSS Grid lets you exercise even greater control by specifying the placement of individual grid items. You can use grid line numbers to control how items are placed, by applying properties directly to a grid item. This gives you precise control over grid item placement, size and order.
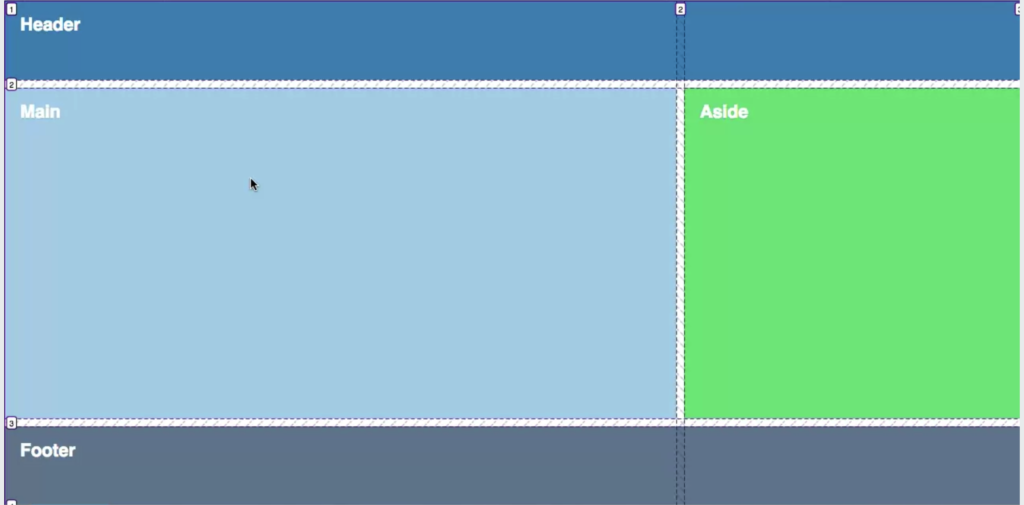
Line-based placement makes it possible to build your entire page using grid layout.
<!DOCTYPE html>
<html>
  <head>
    <title>CSS Grid Layout</title>
	  <link href='https://fonts.googleapis.com/css?family=Varela+Round' rel='stylesheet' type='text/css'>
    <link href="css/page.css" rel="stylesheet">
    <link href="css/grid.css" rel="stylesheet">
  </head>
  <body>
    <div class="container"> <!-- grid container -->
      <header>Header</header> <!-- grid item -->
      <main>Main</main> <!-- grid item -->
      <aside>Aside</aside> <!-- grid item -->
      <footer>Footer</footer> <!-- grid item -->
    </div> <!-- end grid container -->
  </body>
</html>
/* =====================================
Grid Layout
======================================== */
.container {
display: grid;
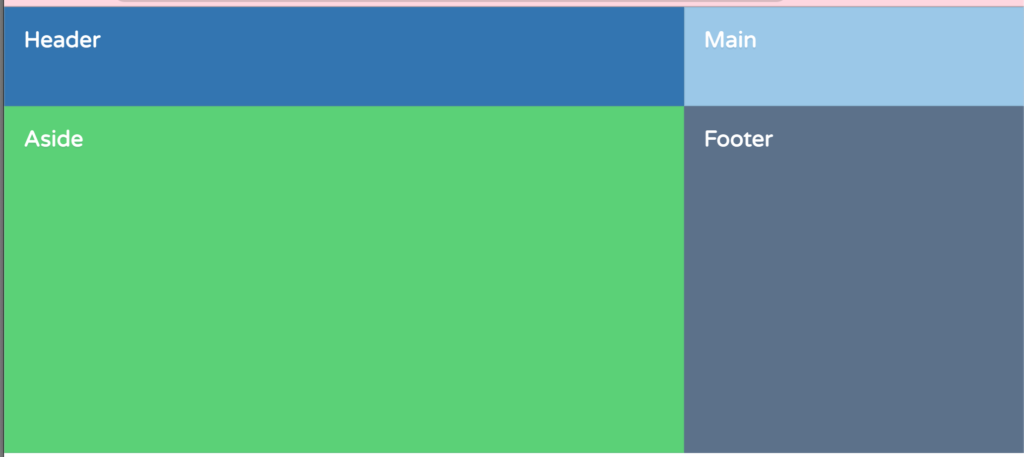
grid-template-columns: 2fr 1fr; /* two columns for the main content and sidebar */
grid-template-rows: 100px 350px 100px; /* three rows for header, main and aside, and footer */
}
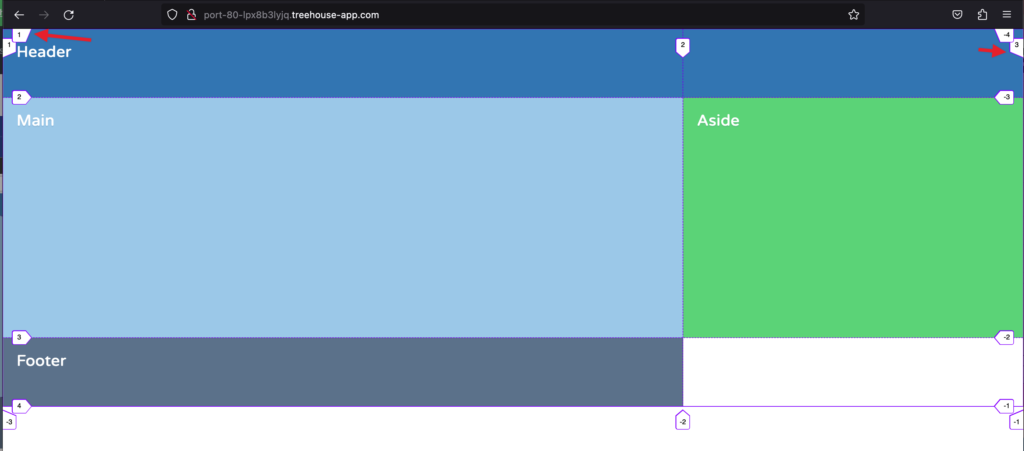
Control how many lines it should span.
header {
  grid-column-start: 1; /* a number that indicates the start line in a row*/
  grid-column-end: 3; /* a number that indicates the end line in a row*/
}
/* =====================================
   Grid Layout
======================================== */

.container {
  height: 100vh; /*vh means "view-port height */
  display: grid;
  grid-template-columns: 2fr 1fr; /* two columns for the main content and sidebar */
  grid-template-rows: 100px minmax(200px, 1fr) 100px; /* three rows for header, main and aside, and footer */
  grid-gap: 10px;
}

header, footer {
  grid-column-start: 1; /* a number that indicates the start line in a row*/
  grid-column-end: 3; /* a number that indicates the end line in a row*/
}
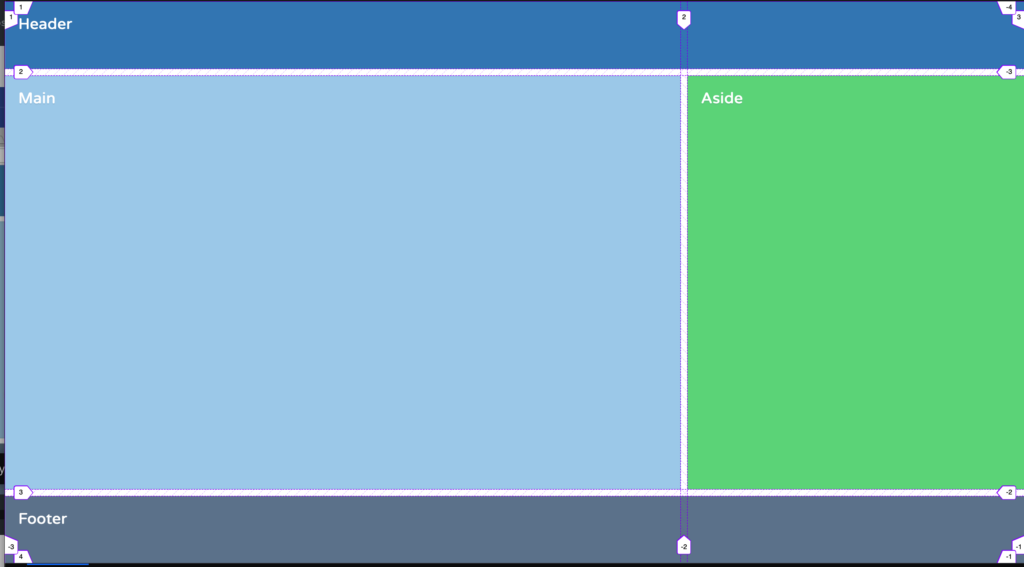
In this example above, we stretched the header and footer to consume the entire row (start row line 1 to row line 3).
/* =====================================
   Grid Layout
======================================== */

.container {
  height: 100vh; /*vh means "view-port height */
  display: grid;
  grid-template-columns: 2fr 1fr; /* two columns for the main content and sidebar */
  grid-template-rows: 100px minmax(200px, 1fr) 100px; /* three rows for header, main and aside, and footer */
  grid-gap: 10px;
}

header {
  grid-column-start: 1; /* a number that indicates the start line in a row*/
  grid-column-end: 3; /* a number that indicates the end line in a row*/
}

main {
  grid-row-start: 2; /* a number that indicates the start line in a column*/
  grid-row-end: 4; /* a number that indicates the end line in a column*/
}

footer {
  grid-column-start: 2; /* a number that indicates the start line in a row*/
  grid-column-end: 3; /* a number that indicates the end line in a row*/
}
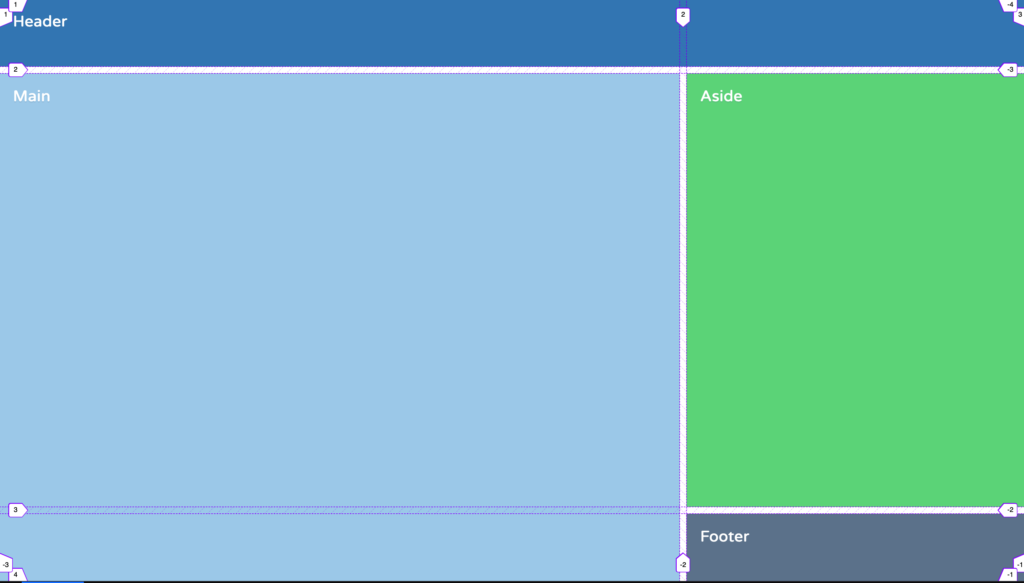
In this example above, we set the footer to only take row line 2 up to row line 3. Then the main container takes column line 2 up to column line 4.
Line-based Placement
grid-column-startandgrid-row-startspecify the line where the item beginsgrid-column-endandgrid-row-endspecify the line where the item ends
Leave a Reply